0120-987-742
Have you installed a 3D printer but are having trouble getting the desired results?
If post-treatment is not performed properly after molding, the surface may become rough or lack strength.
This article details the post-processing flow for the FDM (thermal melting and laminating) method and the SLA method (optical modeling), and also introduces precautions to prevent failures.
For more information about Taiga, click here.Table of Contents
Post-processing determines the finished result of 3D printing.
3D printing is not yet complete when the modeling (output) is completed.
Without proper post-treatment, the surface may become rough and unsightly, or it may lack strength and become fragile.
In particular, the "FDM (thermal melting and lamination) method" and "FFF (filament melting and lamination) method" laminate melted filaments, so unevenness (lamination marks) is easily noticeable, and polishing is necessary to smooth them out.
In addition, in the SLA method (photoengineering), cleaning and secondary curing are essential because the uncured resin remains on the surface, causing stickiness and fogging.
Take the appropriate post-processing steps to achieve the desired result.
Post-processing flow of FDM method (thermal dissolution lamination method)
In the FDM and FFF methods, filaments are melted and stacked, so processing is required to eliminate surface steps after modeling. Post-processing is specifically performed according to the following procedure.
Removing the molding from the plate
Once the modeling (output) is completed, the first step is to carefully remove the modeled object from the plate.
At this time, be careful not to damage the molding with a spatula or scraper.
Remove support material
In the case of the FDM and FFF methods, filaments are piled up from the plate portion to form the object, and the support material (scaffold) supports the floating part of the three-dimensional object in the air.
The method of removal depends on what kind of material the support material is made of, which we will check below.
| Support material filament | Removal Method |
| Same as molding | Remove with pliers or nippers. Eye and hand protection is necessary. |
| PolySupport | Easily removable by hand. |
| PolyDissolve S1 | Soak in water at room temperature and wait 2-5 minutes. The support material will swell, so remove it by hand. Remove the remaining support material by soaking it in water again. |
| Ultrafuse HIPS Filament | Remove with limonene, etc. Ventilation and protective equipment are required because of the chemical. |
Perform surface finishing
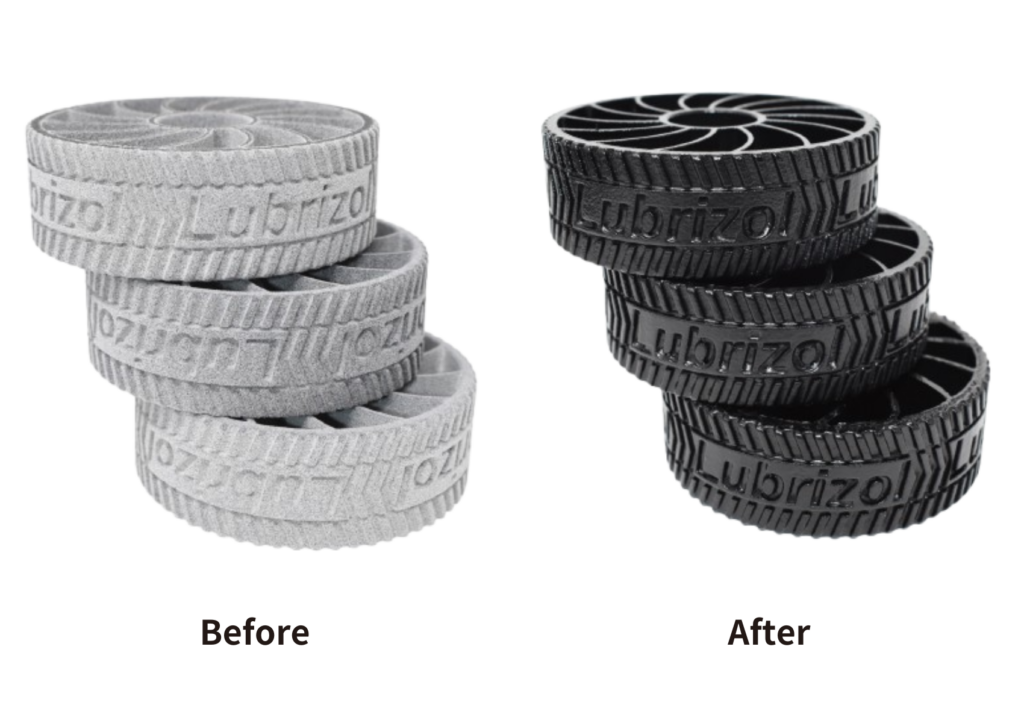
The modeling output by the FDM/FFF method shows unevenness called "stacking traces" over the entire surface.
In order to eliminate these lamination marks, it is necessary to scrape and polish the surface with sandpaper or abrasive film.
The file is transitioned from coarse grit to fine grit in turn, and a smooth surface is achieved by polishing evenly.

If the filament used is made of ABS material, acetone vapor treatment (to melt the lamination marks and smooth the surface) is also possible.
Another technique is to fill in the lamination marks. This is a technique in which putty or primer is applied to the surface of the modeling object to fill in the lamination marks and create a smooth finish.
Especially when painting, a combination of these methods can be used to achieve a higher precision finish.
Flow of post-processing for laser fabrication (SLA method)
Optical modeling (SLA method) cures liquid resin with ultraviolet light and requires different post-processing than the FDM method.
Removing the molding from the plate
First, carefully remove the molding from the plate.
Remove it from the plate with a spatula or scraper. Be careful not to hurt your hands at this time.
Remove excess resin with alcohol.
Next, excess resin is removed with alcohol. This is the so-called "cleaning" process.
Since "uncured resin" that has not hardened during the molding stage adheres to the modeled object output by optical modeling, it is soaked in highly concentrated alcohol such as isopropyl alcohol (IPA) or a special cleaning solution to remove the resin.
When cleaning with IPA, care must be taken in handling the cleaning solution. Please note the following points
- Handled by persons who have completed a technical training course for organic solvent operation supervisors.
- Perform medical examinations in accordance with the Regulations for the Prevention of Organic Solvent Poisoning.
- The flash point of IPA is 12°C. Even at room temperature, IPA can ignite due to static electricity.
- Wear gloves to avoid causing allergies
- Gas masks must be worn during use
- Install local exhaust ventilation
- Requires biannual working environment measurements
Note that if a water-wash resin is used, it can be cleaned by rinsing with water.
Select the best resin and cleaning method for you based on cost and ease of handling.
Secondary hardening
After cleaning, allow the cleaning solution to dry thoroughly before moving on to secondary curing.
The reason for secondary curing is to completely harden the "semi-cured layer" that has not fully cured by the time cleaning is completed, thereby increasing the strength of the modeled object.
Secondary curing also eliminates stickiness on the surface of the modeled object.
For secondary curing, it is possible to use special machines and other curing light machines used for gel nails.
Check the width and height of the machine carefully and choose the size that will fit the modeling object to be made.
Remove support material
After the secondary curing is complete and the shape of the molding has solidified, remove the support material.

The reason for not removing the support material first is that the shape of the molding may be distorted if the support material is removed before the secondary curing is completed.
Perform surface finishing
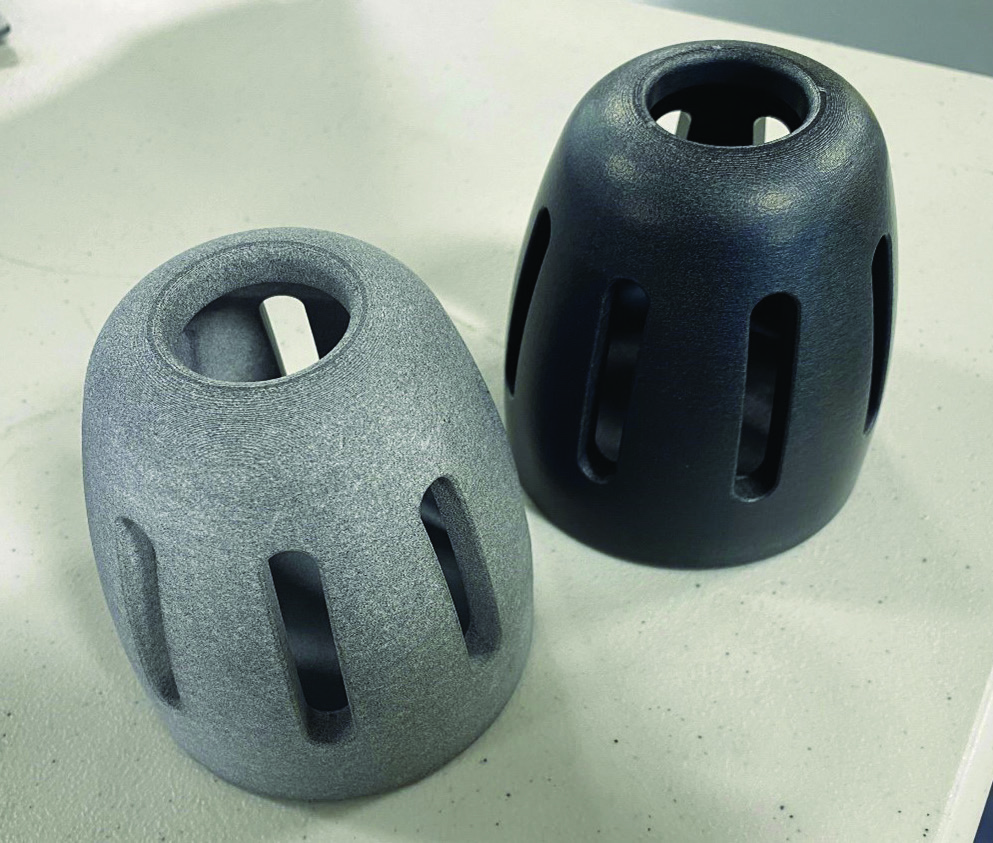
Finally, a surface finish is applied.
Basically, the process of "polishing, coating (+ painting), and repairing" is generally repeated until the ideal finish is achieved.
Below is a table with explanations for each process.
| manufacturing process | Details |
| polishing | Use sandpaper. Gradually change from a coarse grit to a fine grit to prepare the surface irregularities. |
| Clear coating (+ paint) | Resin becomes yellowish and brittle under ultraviolet light, so a coating is applied that provides UV protection. It is also effective in increasing strength and waterproofing. Painting, if necessary, is also done at this stage. |
| repair | If bubbles or scratches remain, fill them with liquid resin or putty, then polish and coat again. |
During the coating process, depending on the application, a glossy or matte finish can be selected for a more ideal finish.
Points to Consider in 3D Printing Post-Processing
Each post-processing step requires careful attention.
Specifically, the following points should be noted
under-cleaning
In SLA method, if uncured resin remains, the surface becomes sticky and causes poor curing.
In particular, since resin tends to remain on small parts and intricately shaped parts, use a brush or similar tool to carefully clean them.
Cracking or breakage during removal of support material
When removing the support material, be careful not to crack or damage the modeling object.
In the FDM and FFF methods, the modeling object can be removed without damaging it by using pliers or nippers to cut little by little without applying excessive force.
In addition, the removal of support material tends to be more complicated for moldings made by optical fabrication (SLA method).
Removal with pliers or nippers is possible, but it is better to use special tools.
Insufficient or excessive secondary hardening
SLA method moldings have the property of being completely cured by UV (ultraviolet) irradiation.
Therefore, it should be noted that if the secondary curing is insufficient, the modeling object will be soft and lack strength.
Be aware, however, that excessive hardening may cause the material to shrink and warp, or even crack on the surface.
The trick is to apply UV irradiation at the appropriate time and intensity, and to rotate and cure the UV light so that it shines evenly on each surface.
Summary
Post-processing of 3D printing greatly affects the quality of the modeled product.
In the FDM and FFF methods, polishing and acetone treatment to smooth lamination marks are important, while cleaning uncured resin and thorough secondary curing are essential in optical modeling (SLA method).
After 3D printing, appropriate post-processing should be carefully performed to improve not only the appearance of the product, but also its strength and durability.
If you are considering manufacturing parts using 3D printing, please contact us!Taiga."Please make use of the following
Taiga is a free service that allows you to consult with experienced contractors.
We can efficiently proceed with the development of difficult or new parts, small-lot production, prototyping, and mass production while keeping costs low.
For more information about Taiga, click here.