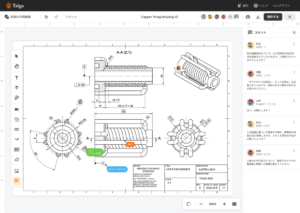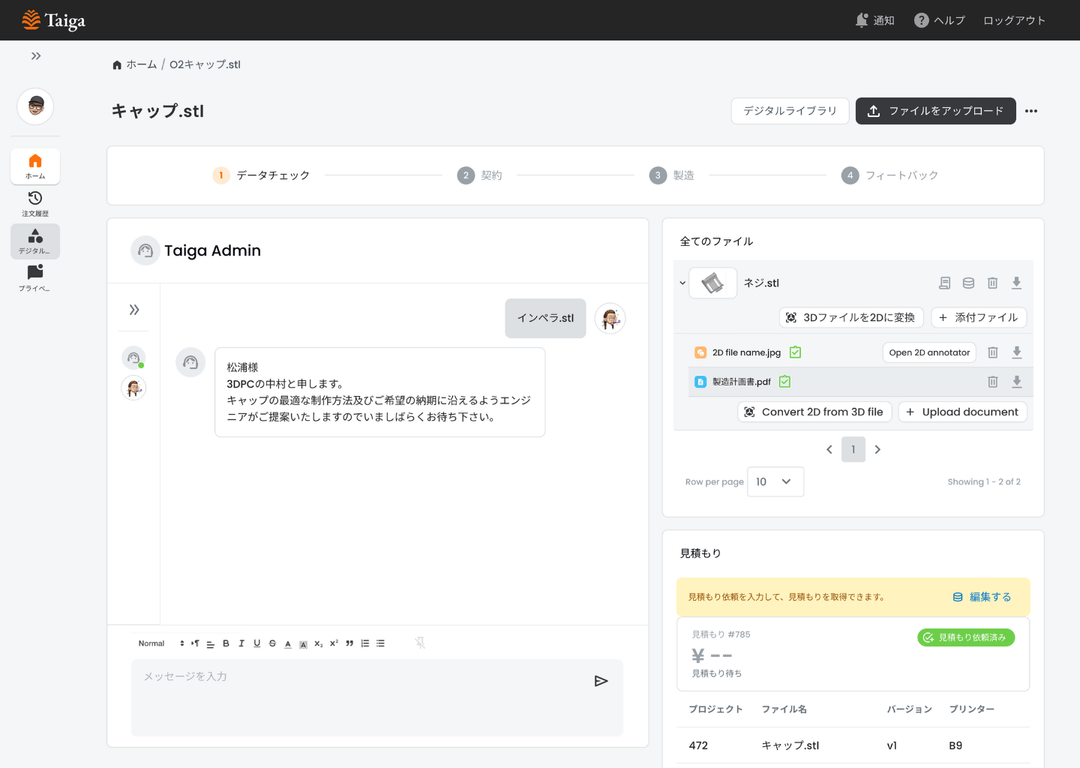
The Taiga has a feature called "grouping".
Data such as 3D models, 2D drawings, photos, and PDF files can be managed by linking them as parent and child files.
The relationship between data can be easily organized and the necessary data can be found immediately.
The grouping function can be used in both (1) the project creation screen and (2) the project management screen.
First of all, we will show you how to use the grouping function in the project creation screen in (1).
(1) When used in the project creation screen
1. create a project
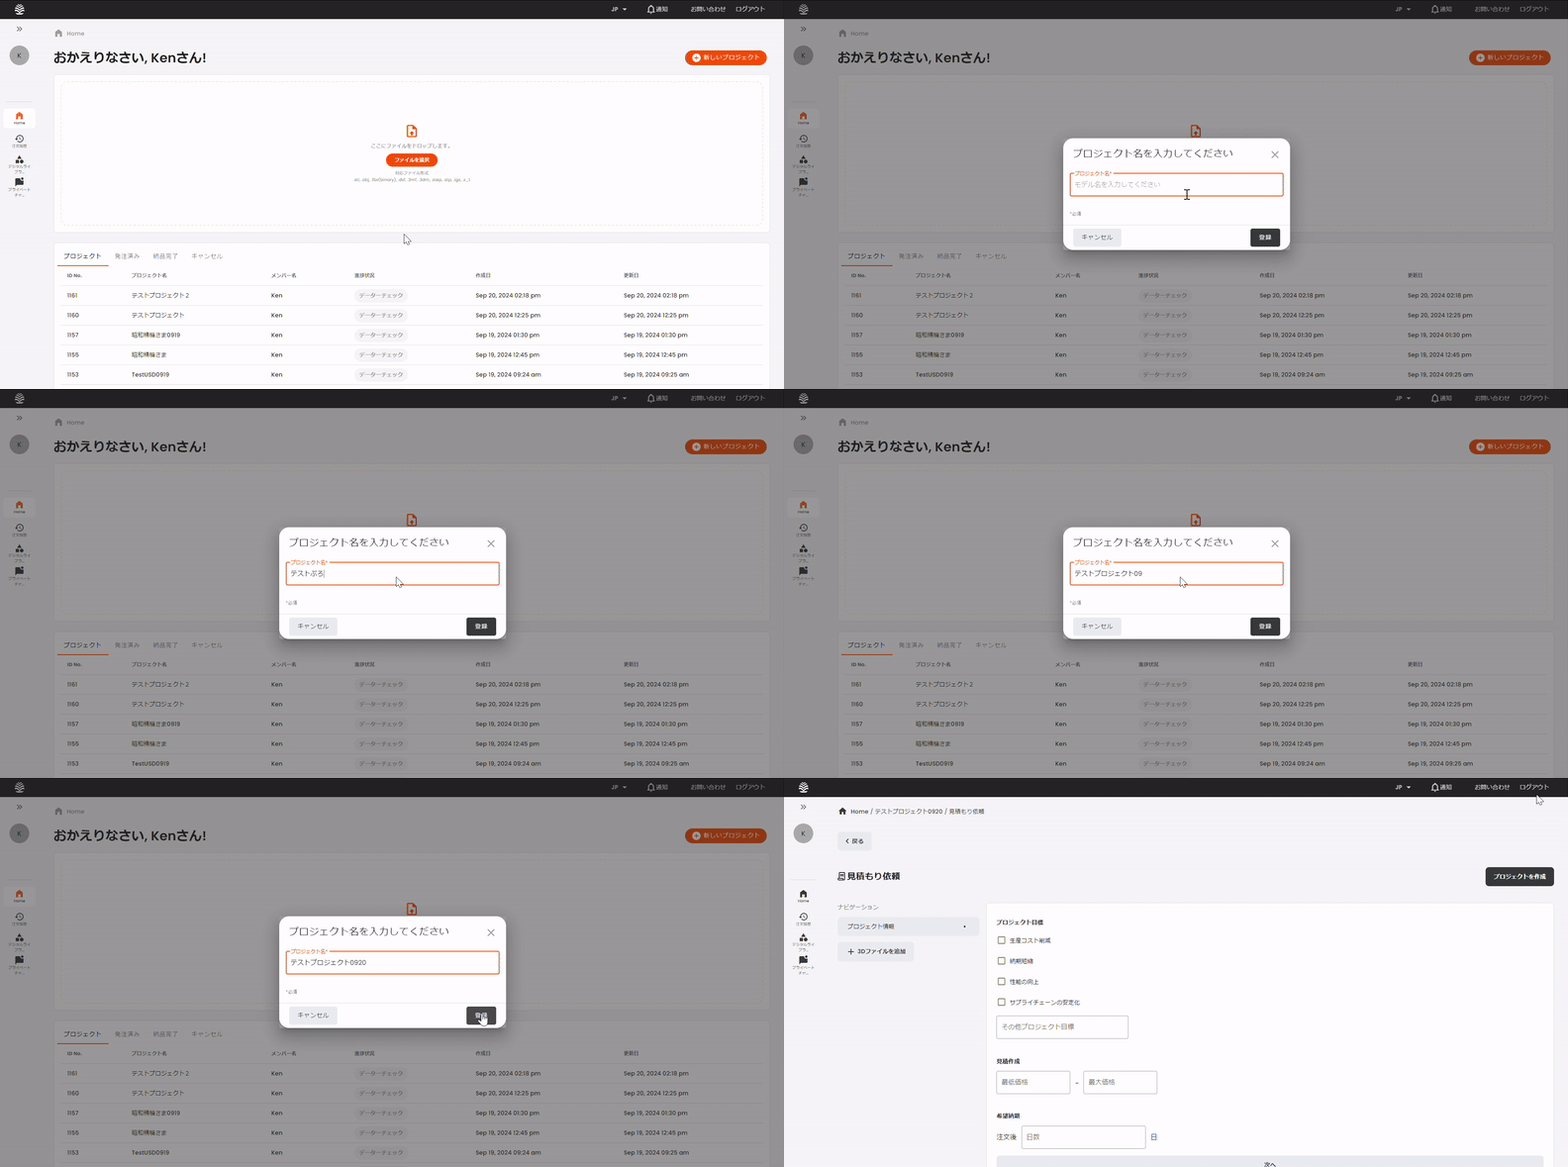
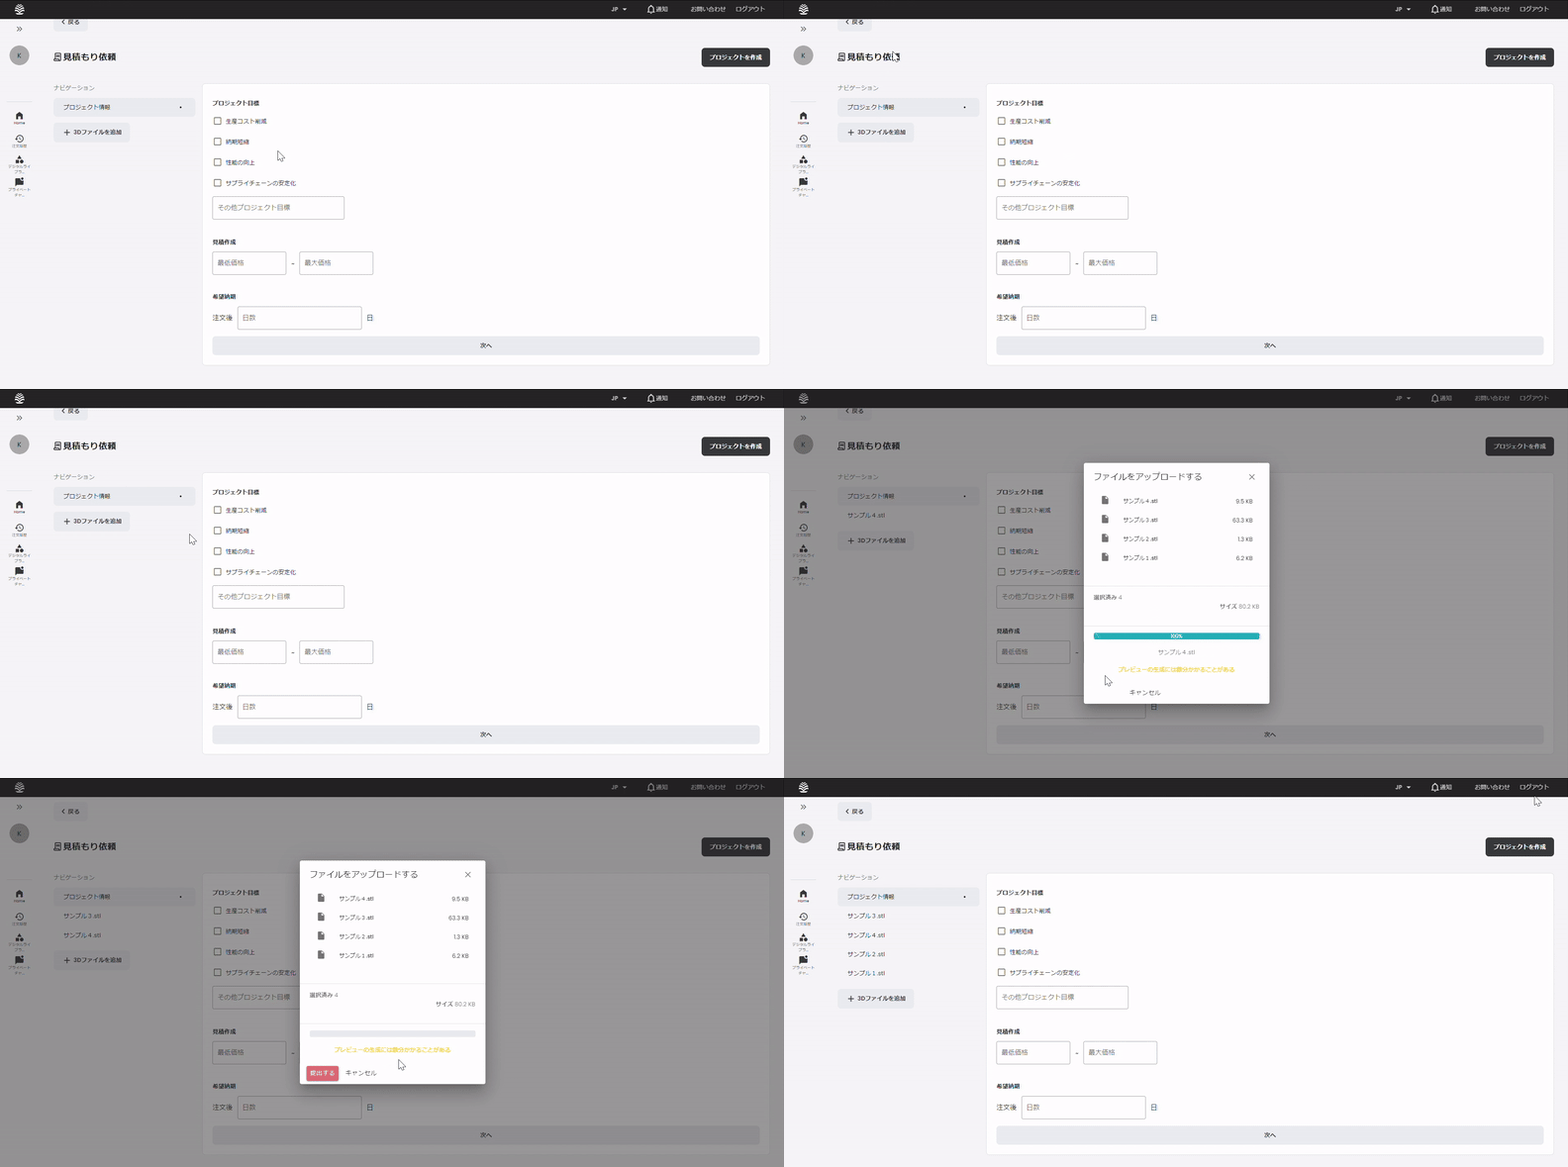
2. upload 3D data of the part
3a. Select "2D Drawing" from the left side of the screen and click "Attachments
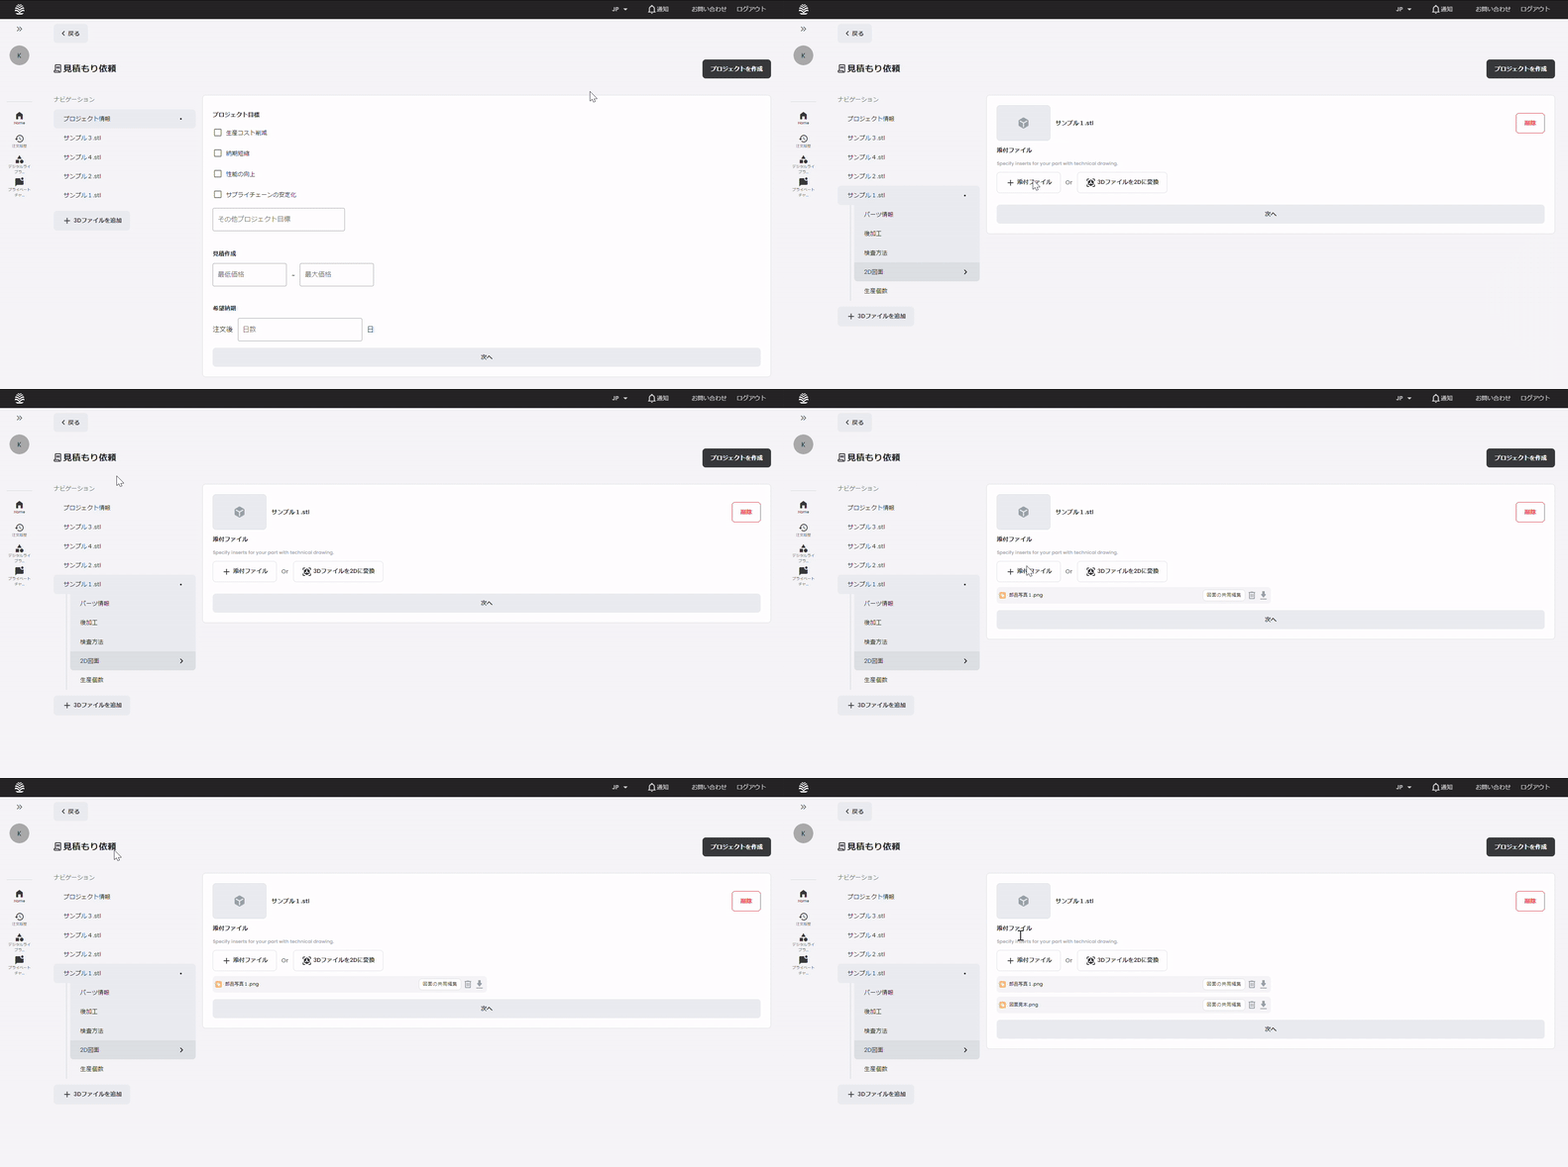
3b. If you do not have the drawing at hand, click "Convert 3D file to 2D".
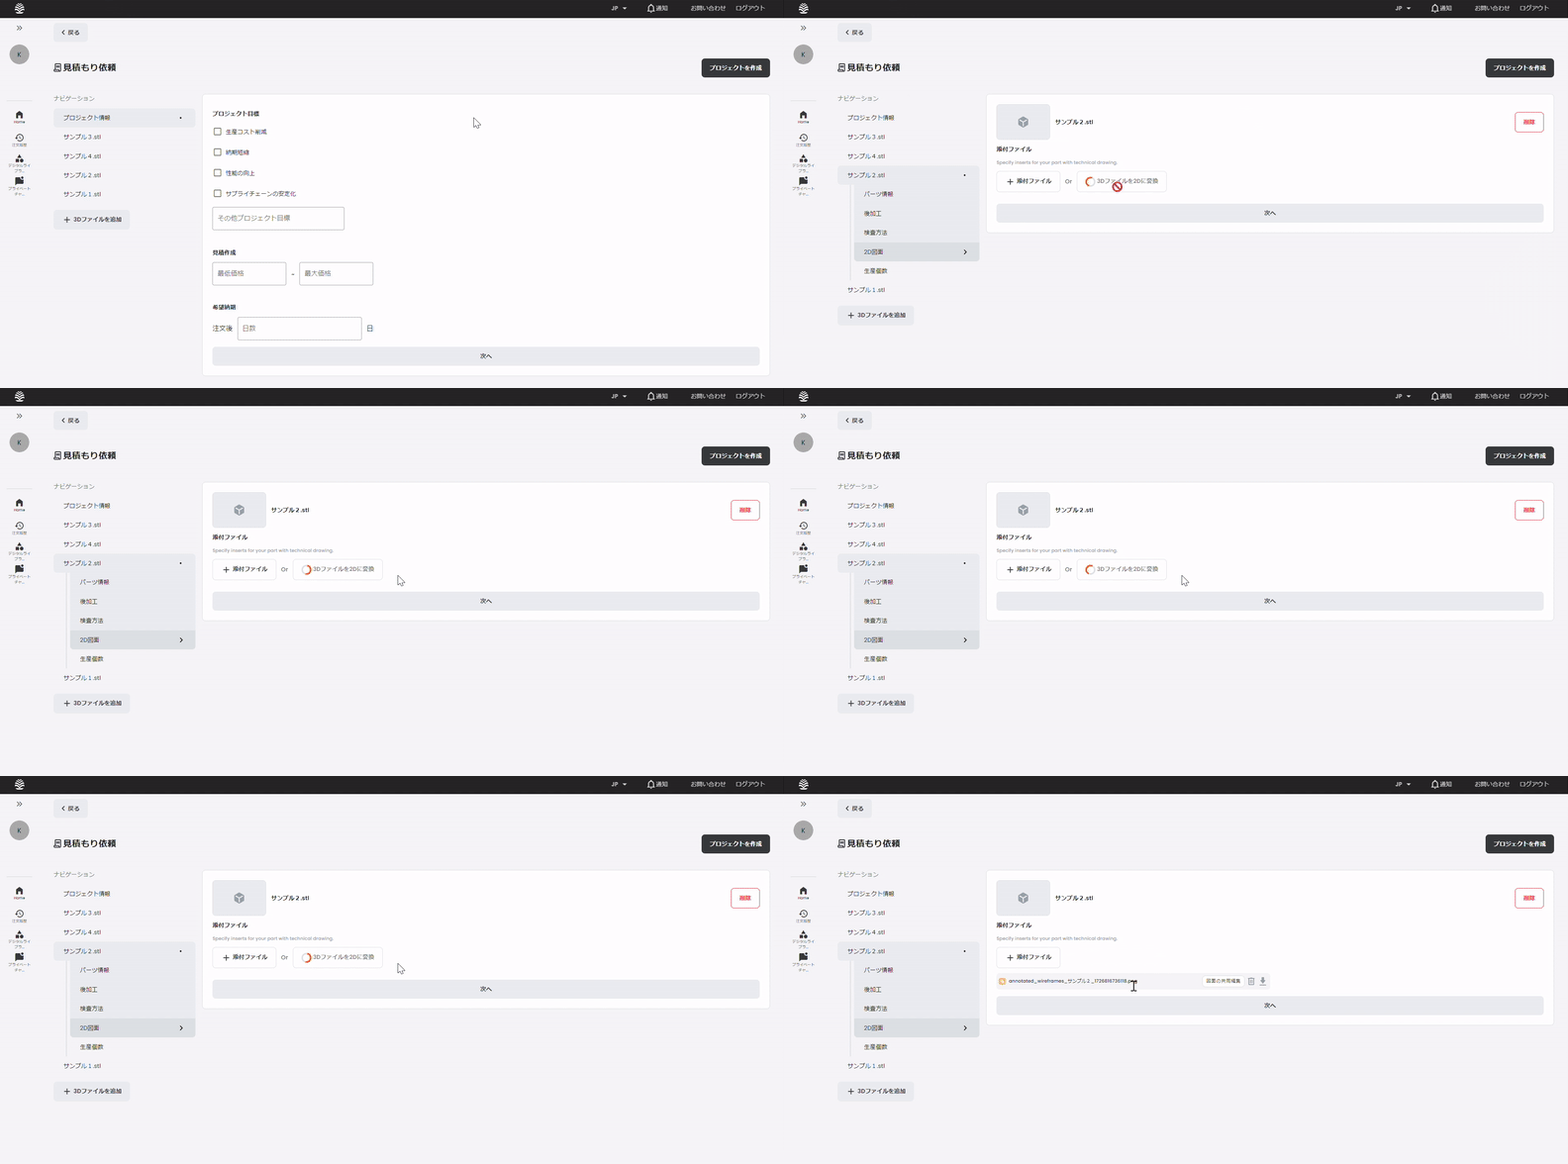
Confirmation of the linkage on the project management screen
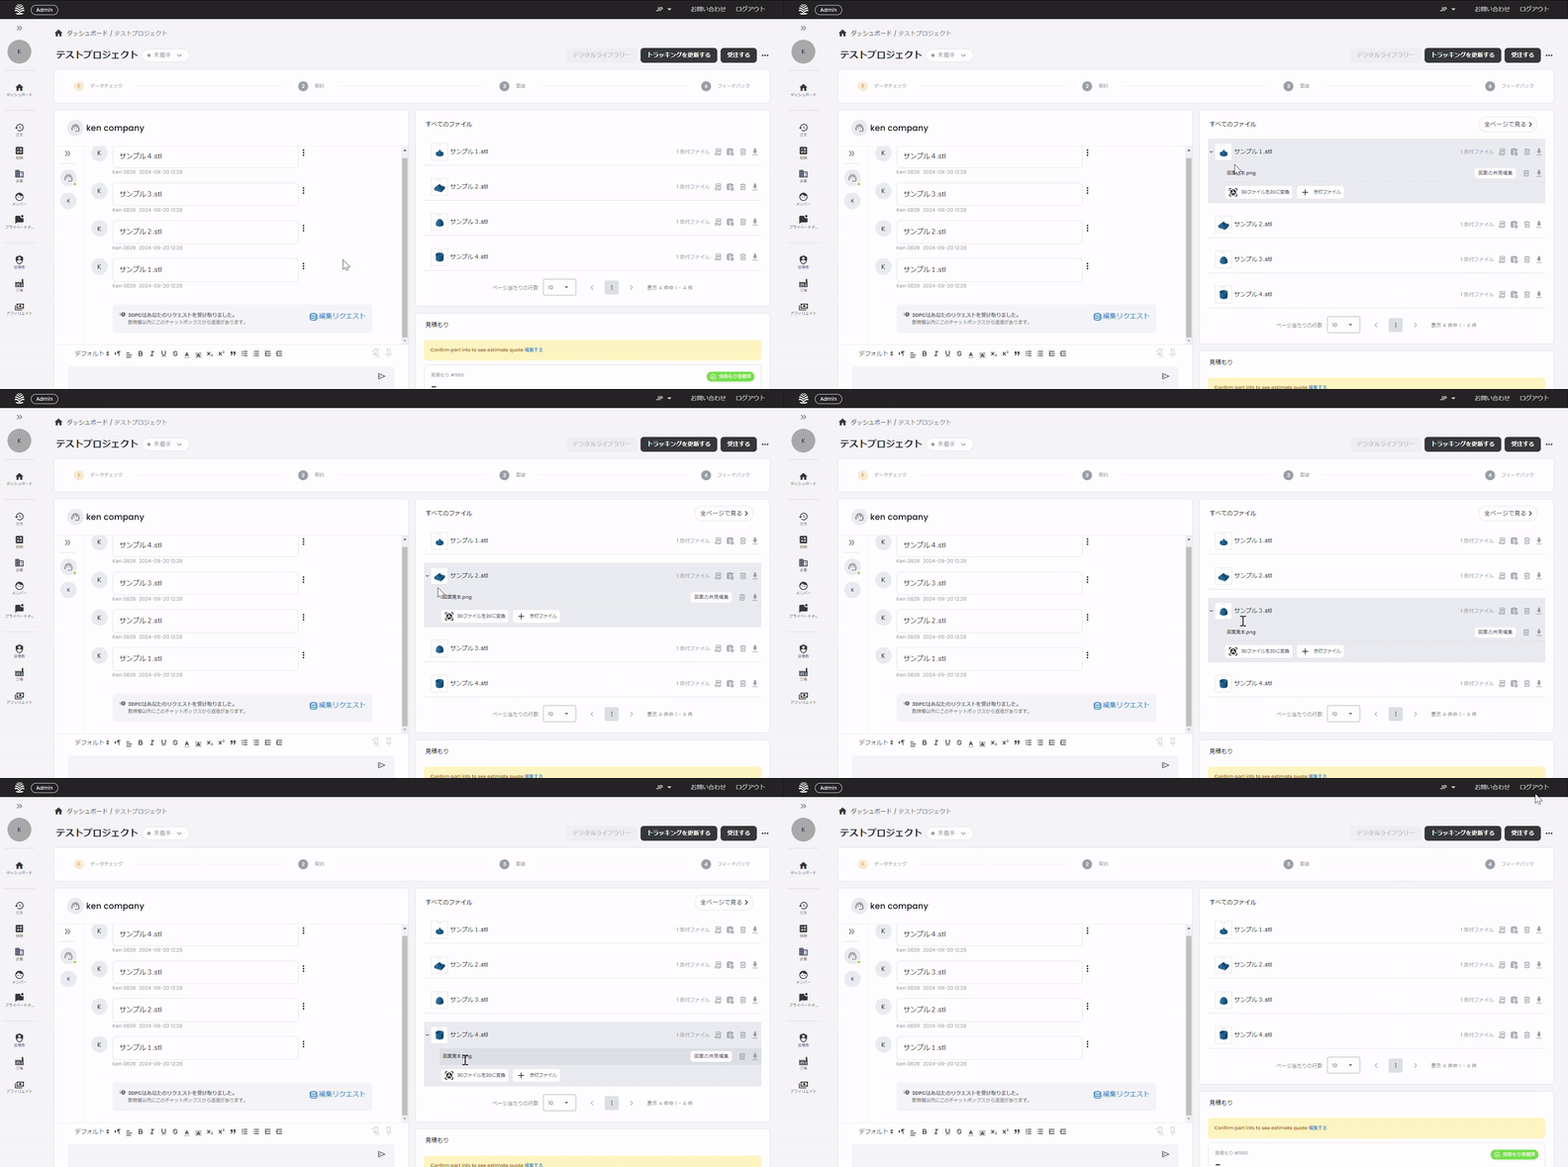
You can now use the "Grouping Function" on the (1) Project Creation screen.
Below is a comparison of the screens of projects that use the grouping function and those that do not.
As shown in the image here, data is stored for each part to be manufactured, resulting in a clean screen and intuitive information management.
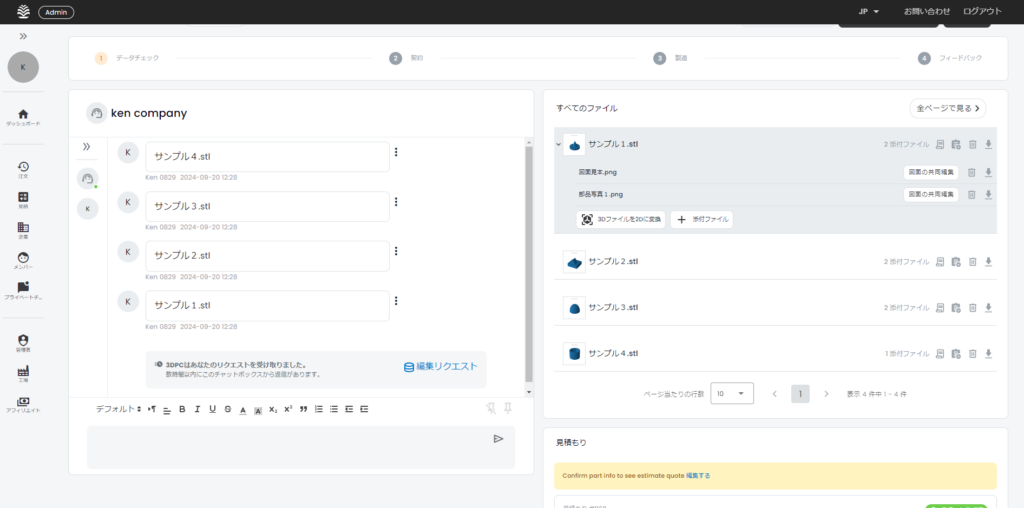
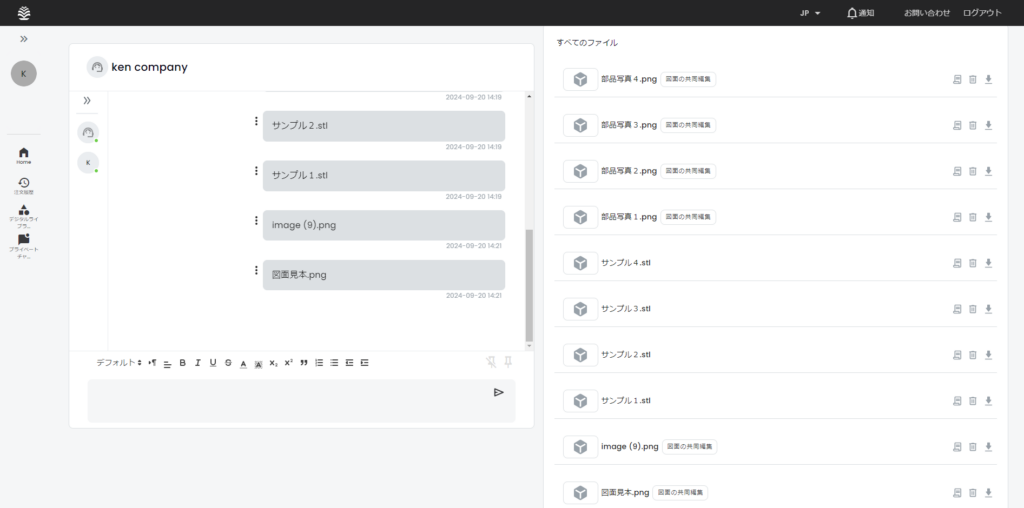
This is the case when not in use. As you can see, uploaded data will be lined up in a row if they are not connected.
The tied data is stored like a chest of drawers, and by holding the cursor over it when needed, information related to the part to be manufactured can be pulled out.

Next, (2) How to use the grouping function on the project management screen.
Three steps are presented in one GIF.
1. hold the cursor over the uploaded data
Click on "+ Attachments
3. select the file you want to link

Now you can use the "Grouping Function" in the (2) Project Management screen.
If you have any questions, please feel free to contact us.

 0120-987-742